Quickstart
Create and deploy your first integration in 5 minutes
Note: This quickstart focuses on developing and deploying your first integration using a pre-configured development environment. For production deployment and environment setup, see the Management section.
Prerequisites
You need:
- VS Code installed
- Docker installed and running
Launch Weik.io environment
Open the development environment directly in VS Code:
The first time you launch the devcontainer, it takes a few minutes to build. Once it finishes, you will have a local Weik.io platform and the weikio CLI tool ready to go.
Verify the environment
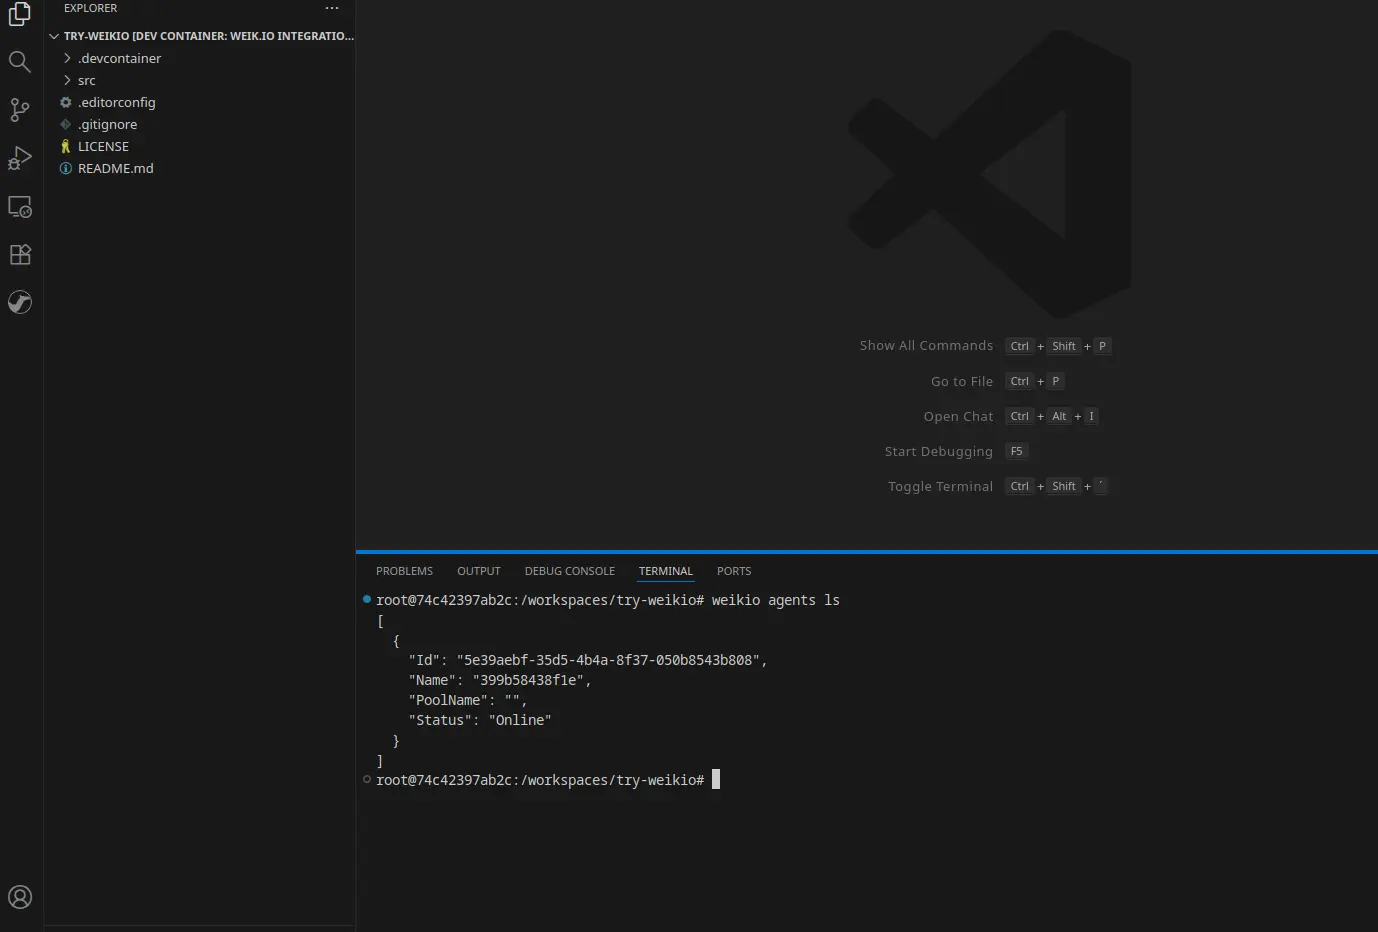
Open a new terminal in VS Code (Terminal → New Terminal) and check that Weik.io is running:
weikio agents ls
You should see the Integration Agent listed in the output:
Create your first integration
Weik.io integration flows run on Apache Camel, which has hundreds of existing connectors for different systems.
Create a directory and initialize a new integration:
mkdir -p integrations
cd integrations
weikio integration init my-first-integration
Output:
Integration initialized to my-first-integration/integration.camel.yaml
To run: weikio integration run my-first-integration
Check the files it generated:
ls -la my-first-integration
You will see an application.properties file and an integration.camel.yaml file:
-rw-r--r-- 1 user user  68 Nov 12 07:48 application.properties
-rw-r--r-- 1 user user 174 Nov 12 07:48 integration.camel.yaml
Look inside the YAML file:
cat my-first-integration/integration.camel.yaml
- from:
    uri: "timer:yaml"
    parameters:
      period: "3500"
    steps:
      - setBody:
          simple: "Hello Weik.io: {{AdditionalMessage}}"
      - log: "${body}"
This is a simple loop. It runs every 3.5 seconds using a timer, pulls a message from the properties file, and prints it to the console.
Visualize the integration
If you prefer visual editing over typing YAML, you can use Karavan.
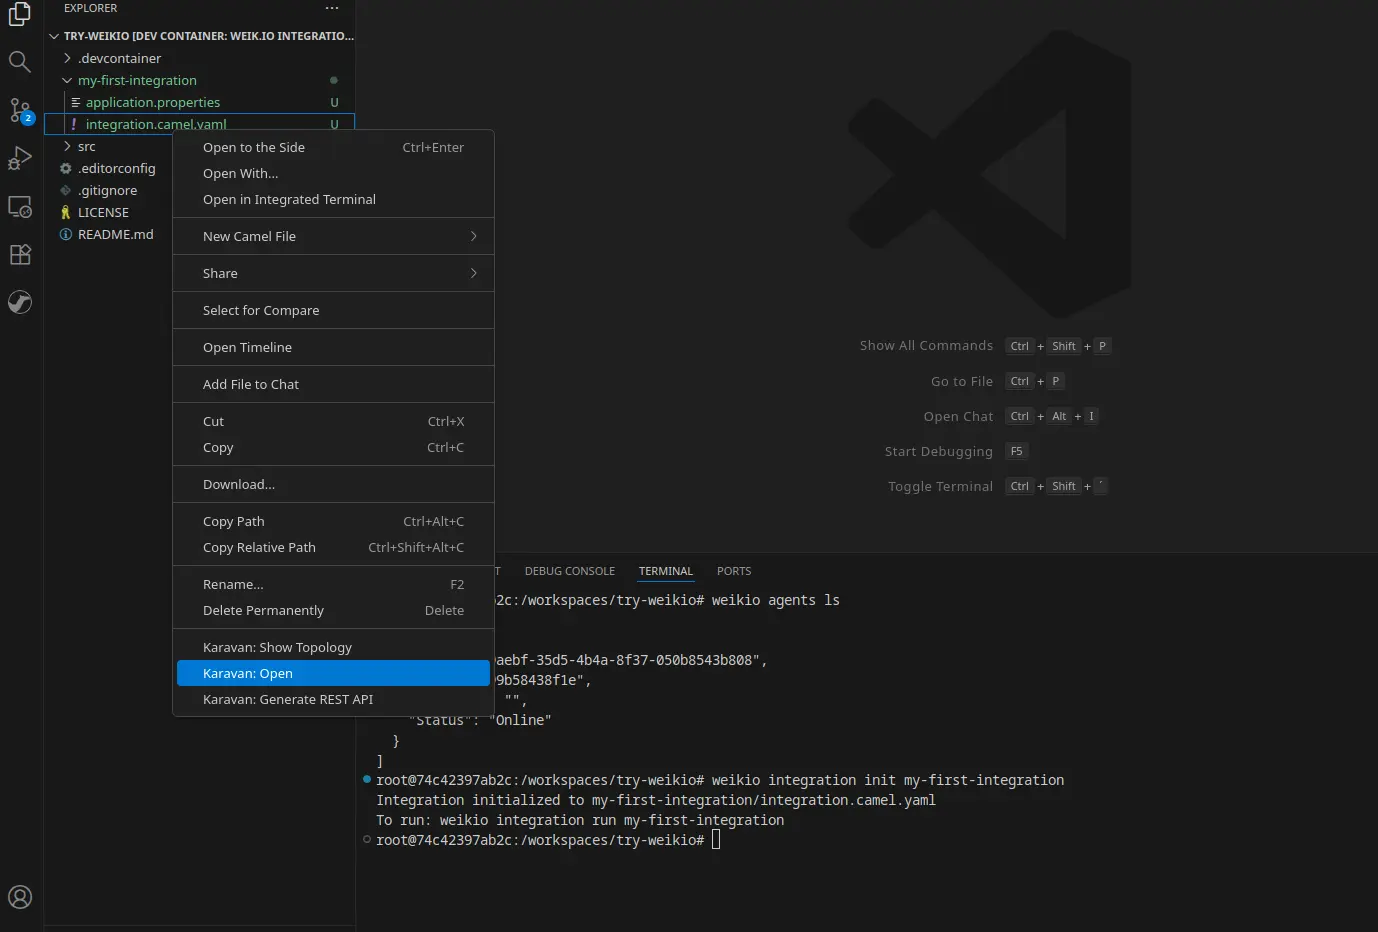
Right-click on my-first-integration/integration.camel.yaml and select Karavan: Open:
Karavan generates a diagram of your flow:
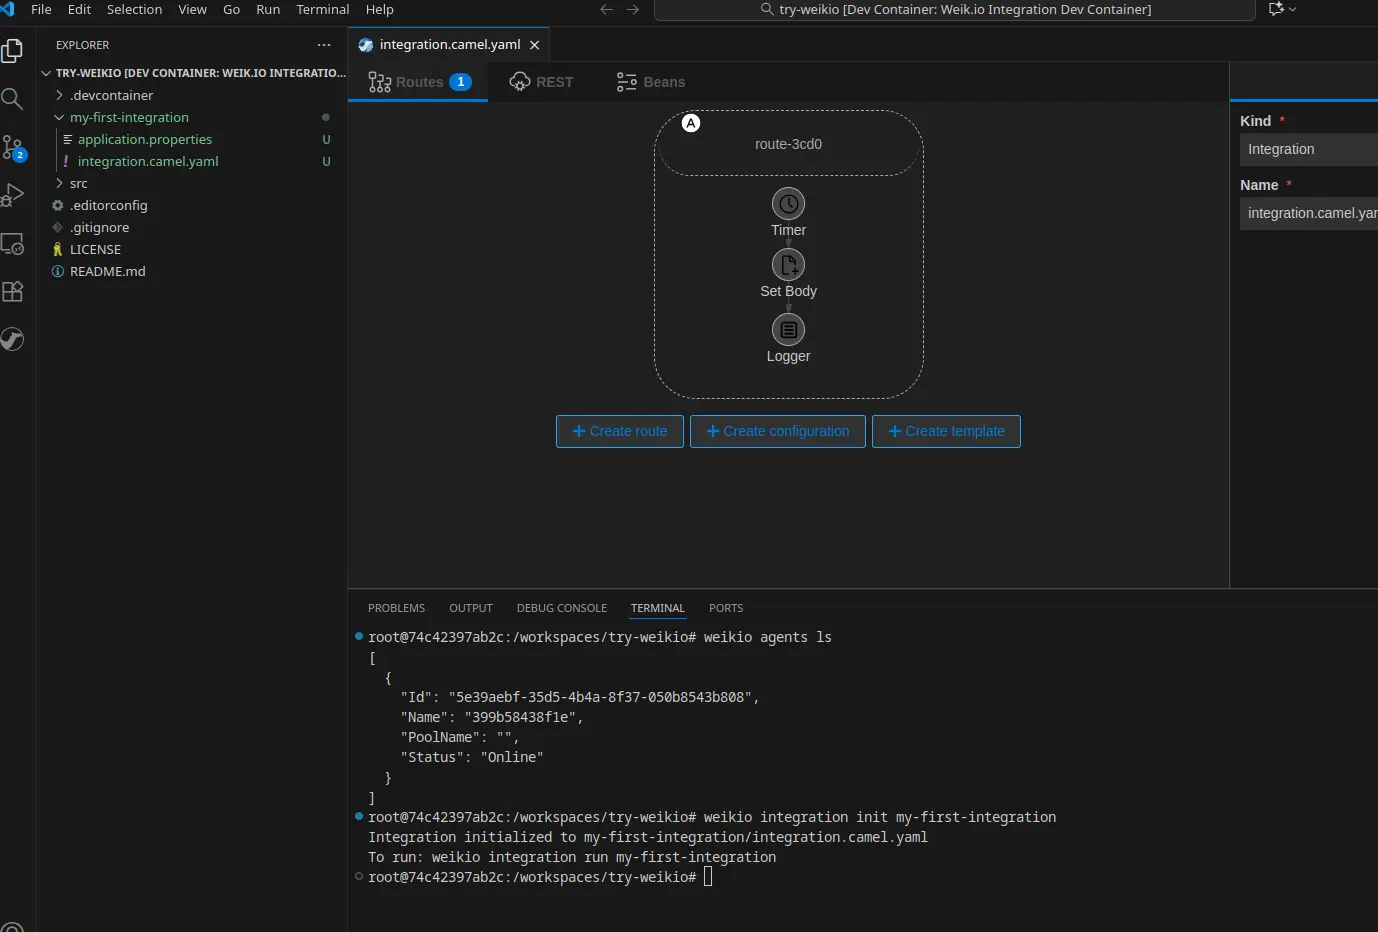
From here, you can add or modify steps using drag-and-drop instead of editing the text file directly.
Test locally
Run the integration on your machine to make sure it works:
weikio integration run my-first-integration
The output should look something like this:
Starting integration
11/12/2025 5:50:57 AM: Information: Apache Camel (JBang) 4.4.1 is starting
11/12/2025 5:50:58 AM: Information: Apache Camel 4.4.1 (my-first-integration) is starting
11/12/2025 5:50:58 AM: Information: Property-placeholders summary
11/12/2025 5:50:58 AM: Information:     [application.properties]       AdditionalMessage=This message comes from the application.properties
11/12/2025 5:50:58 AM: Information: Routes startup (started:1)
11/12/2025 5:50:58 AM: Information:     Started route1 (timer://yaml)
11/12/2025 5:50:58 AM: Information: Apache Camel 4.4.1 (my-first-integration) started in 152ms
Integration started successfully, press q to exit, s for stats
11/12/2025 5:50:59 AM: Information: Hello Weik.io: This message comes from the application.properties
11/12/2025 5:51:02 AM: Information: Hello Weik.io: This message comes from the application.properties
11/12/2025 5:51:06 AM: Information: Hello Weik.io: This message comes from the application.properties
It is logging the message every 3.5 seconds.
Press q to stop the integration.
Deploy to Weik.io
Now, push the integration to your local Weik.io platform:
weikio integration push my-first-integration
It will print the JSON configuration showing what was deployed:
{
  "Name": "my-first-integration",
  "Project": "",
  "Variables": {
    "AdditionalMessage": "This message comes from the application.properties"
  },
  "Labels": [],
  "IntegrationFiles": [
    {
      "FileName": "integration.camel.yaml",
      "FileContent": "- from:\n    uri: \"timer:yaml\"..."
    },
    {
      "FileName": "application.properties",
      "FileContent": "AdditionalMessage=This message comes from the application.properties"
    }
  ],
  "Requirements": []
}
The integration is now deployed and ready to run on the platform.
Check status
Verify the platform received the integration:
weikio integration flows ls
You should see your integration in the list:
[
  {
    "FlowName": "my-first-integration",
    "Project": "",
    "Status": "Stopped",
    "RequestedStatus": 0,
    "RunningCount": 0,
    "ErrorCount": 0,
    "StoppedCount": 0,
    "UnknownCount": 0,
    "Category": "Flow",
    "AdditionalPackages": null,
    "Version": "1.0.0",
    "Labels": []
  }
]
Right now, its Status will say “Stopped”.
Start the integration
Tell the platform to actually run it:
weikio integration flows start my-first-integration
Check the status again:
weikio integration flows ls
The status should now show “Running”. The Integration Agent has picked it up and is executing the loop:
[
  {
    "FlowName": "my-first-integration",
    "Project": "",
    "Status": "Running",
    "RequestedStatus": 1,
    "RunningCount": 1,
    "ErrorCount": 0,
    "StoppedCount": 0,
    "UnknownCount": 0,
    "Category": "Flow",
    "Version": "1.0.0",
    "Labels": []
  }
]
View in UI
You can also monitor this from the web dashboard.
- In VS Code, open the Ports tab (usually at the bottom panel)
- Forward port 80 (the UI service)
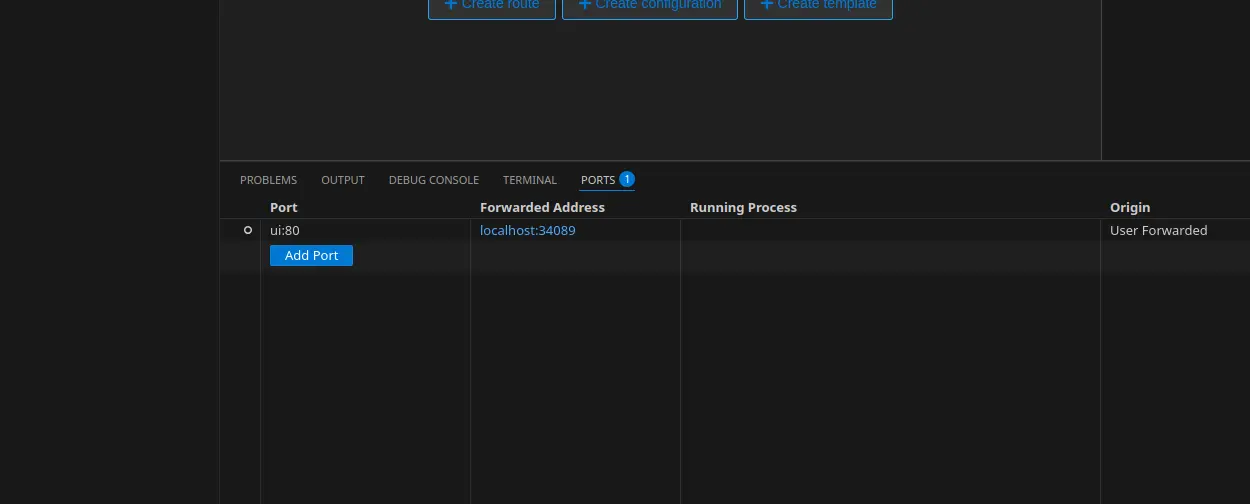
- Open your browser and navigate to the address shown in Forwarded Address (e.g.,
http://localhost:34089) - Login with:
- Username: dev@weik.io
- Password: password
You will see the Weik.io dashboard with your integration:
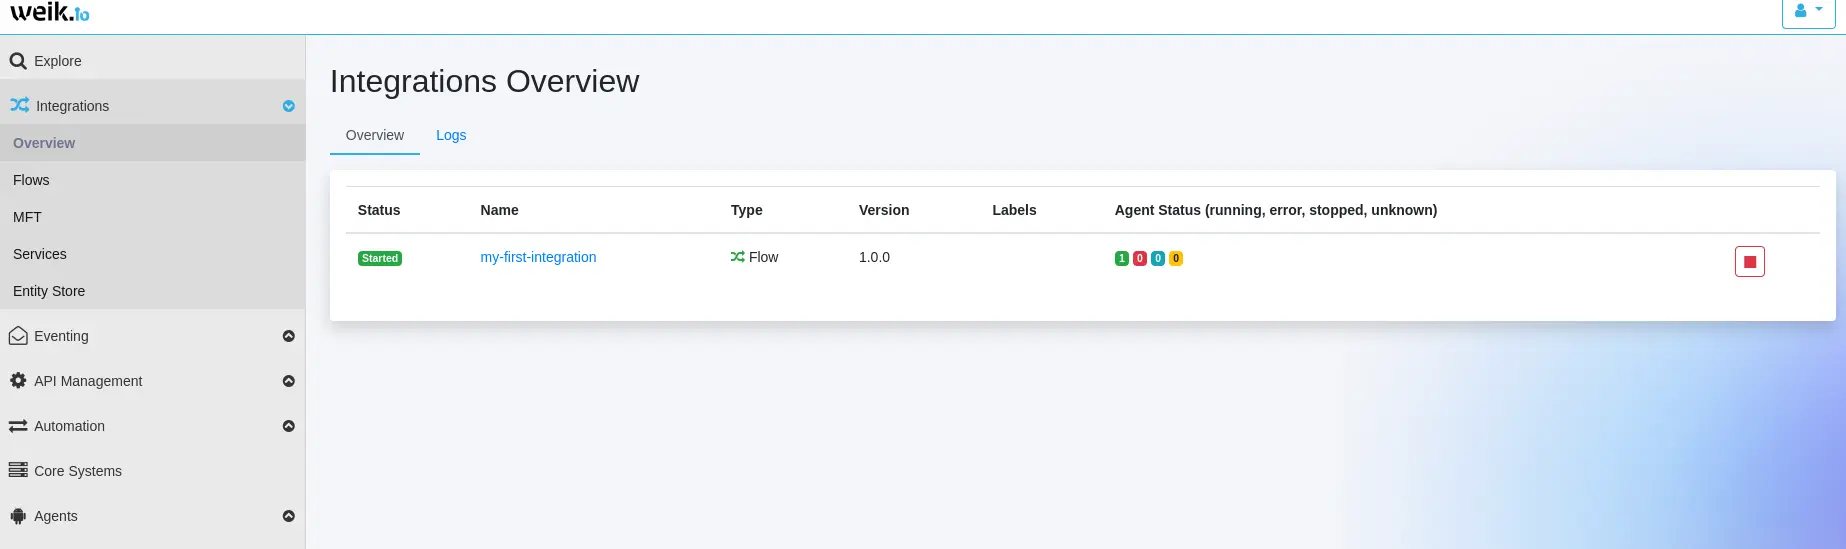
The UI lets you view live logs, monitor status, and manage your deployed integrations without touching the terminal.
Next steps
You now have a working integration. From here, you can:
- Platform Architecture - See how the Weik.io components work together
- Introduction - Read more about what the platform can do
- Apache Camel Documentation - Browse the components you can plug into your flows