Creating APIs and Endpoints
In this how-to guide two APIs are build: One using POCO and one using a delegate. This guide aims to introduce the following two main concepts of API Framework: APIs and Endpoints.
Introduction
By following this guide you will learn:
- How to create APIs using POCOs and delegates
- How to define Endpoints
- How to define the configuration for an Endpoint
We will create a backend which has two APIs: One is built using a POCO and one is built using a delegate (Func). These APIs are used to create 4 different endpoint, each with their own configuration:

What is an API
In API Framework each API has two properties: Name and Version. And the actual functionality they provide.
Most often API is a C# class or a .NET type. But you can also use assemblies, Nuget packages, Roslyn scripts and delegates as APIs. Often the aim is to make APIs reusable and they can be shared using Nuget. There's many APIs available as plugins through Nuget.
What is an Endpoint
An API itself is not accessible through a web request. That's the work of an Endpoint. Endpoint gives your API a route (for example '/helloworld') and a configuration (if needed).
You can create multiple endpoints from each API and every endpoint can have different configuration.
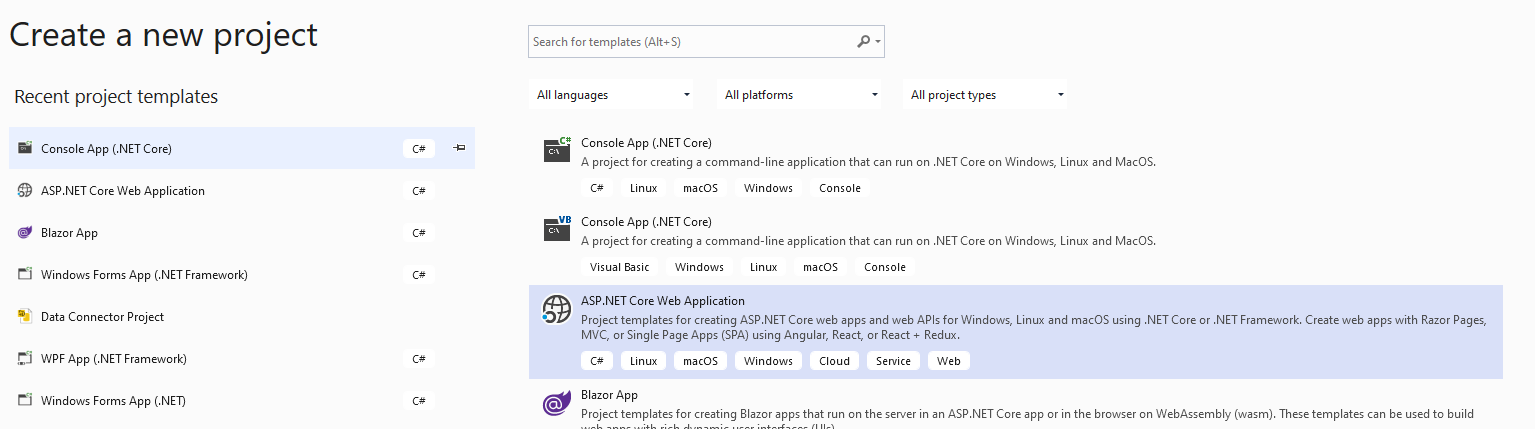
Creating the project
Api Framework can be installed into an existing ASP.NET Core app. It works together with Controllers and Actions. For a new backend, Web Api template is a good starting point. ConfigureServices is used to add Api Framework into app.
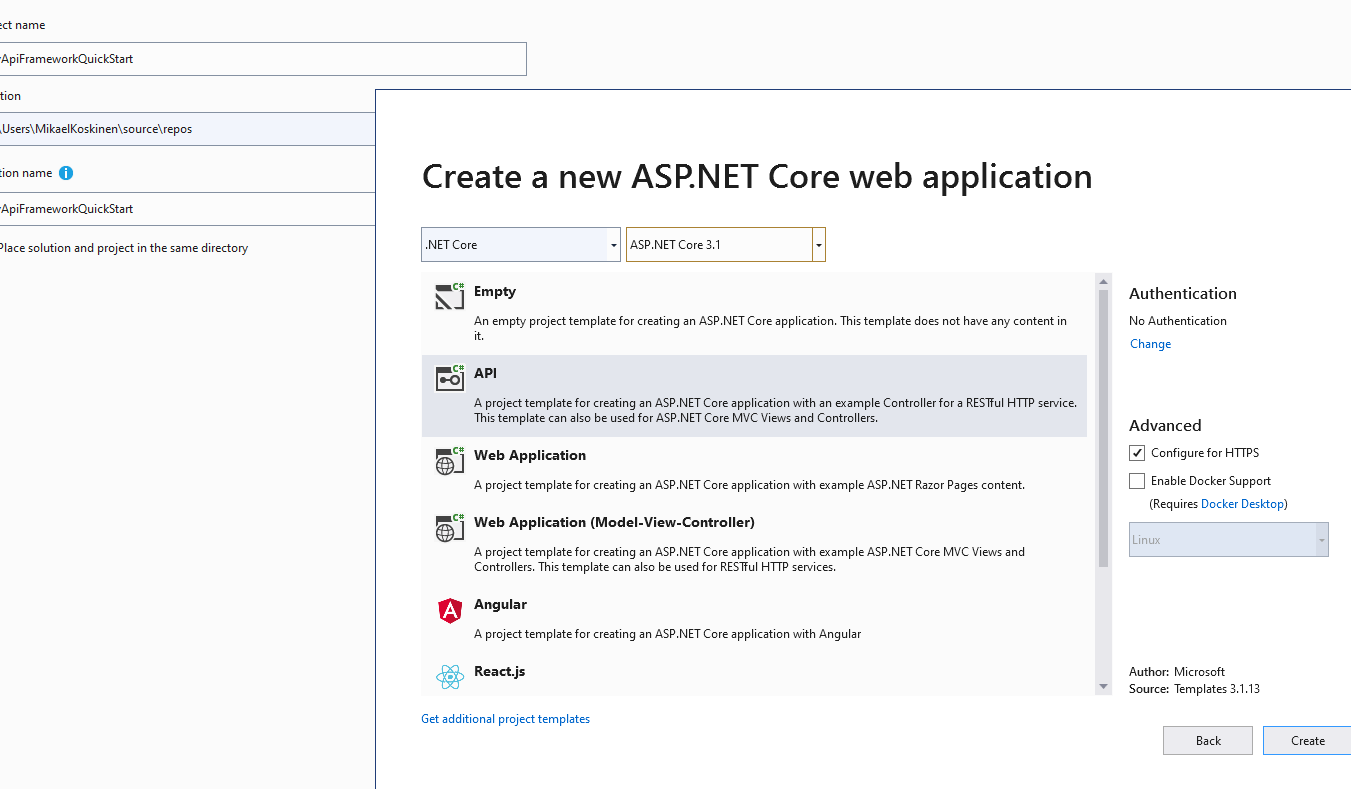
This guide uses the ASP.NET Core Web Application and its API template as the starting point:
Please note: API Framework currently target the LTS version of .NET Core, meaning .NET Core 3.1. Please select that version as the SDK:
This guide uses API Framework's Starter Kit. For an explanation of the differences between Weikio.ApiFramework.Core, Weikio.ApiFramework.AspNetCore and Weikio.ApiFramework.AspNetCoreStarterKit, please see the FAQ.
Starter Kit is available as a Nuget package:

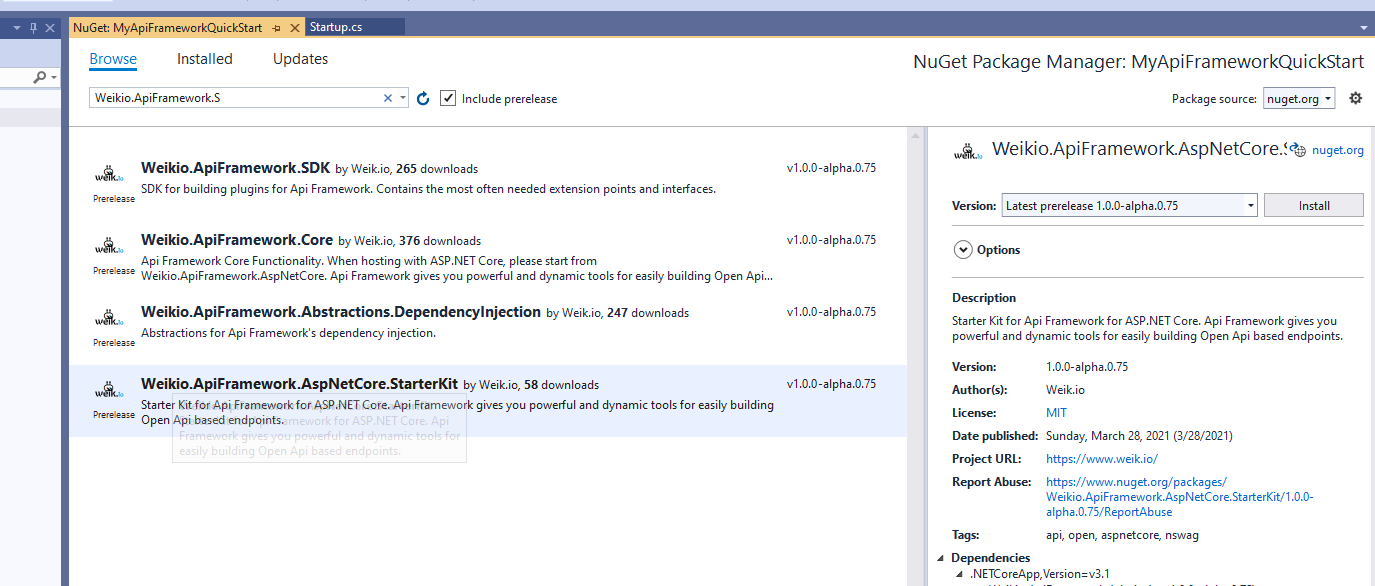
Start by installing the package and then adding API Framework into your application using ConfigureServices in Startup.cs:
public void ConfigureServices(IServiceCollection services)
{
    services.AddControllers();
    services.AddApiFrameworkStarterKit();
}
AddApiFrameworkStarterKit is available from namespace Weikio.ApiFramework.AspNetCore.StarterKit:
using Weikio.ApiFramework.AspNetCore.StarterKit;
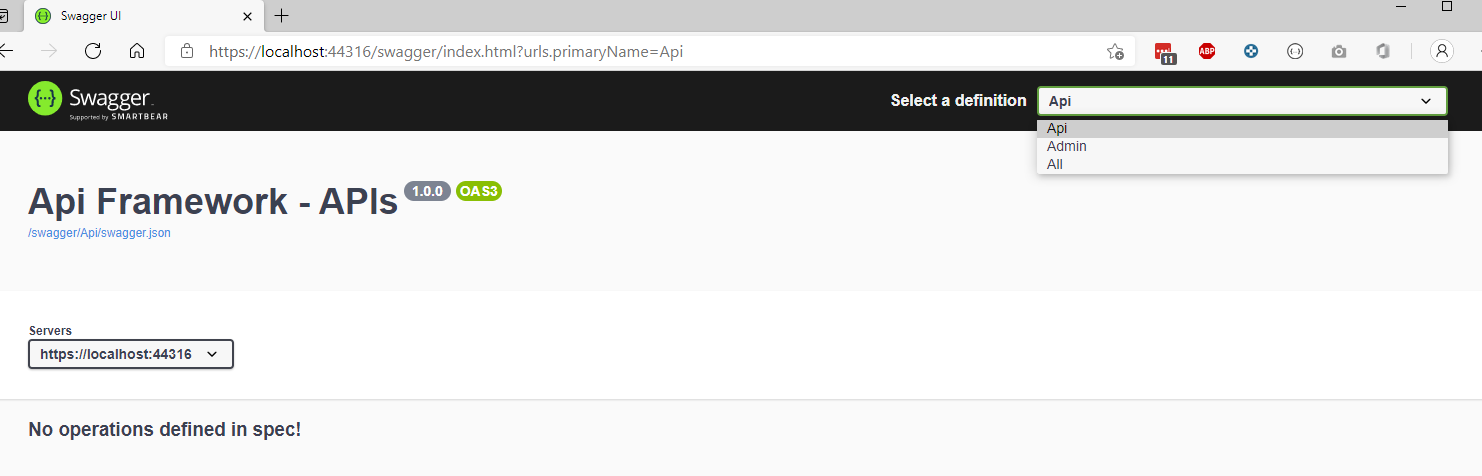
As explained in FAQ, the Starter Kit installs NSwag. If you now start the application and navigate to /swagger, you should see the Swagger UI and three different documents: Api, Admin and All:
Now it's time to create the first API & Endpoint.
Creating an API using POCO
One of the benefits of using API Framework is that you're not limited to controllers when building your backend: APIs can be created with C#, Roslyn Scripts and using delegates.
In this guide we build our first API using a plain old CLR object (POCO). Here's our simple Calculator API:
public class CalculatorApi
{
    public int Sum(int x, int y)
    {
        return x + y;
    }
}
By default the auto-mode in API Framework is disabled. This means that APIs and Endpoints should be configured manually. This provides more flexibility as you can configure routes and more.
The CalculatorApi is added into API Framework's "API Catalog" through ConfigureServices:
services.AddApiFrameworkStarterKit()
    .AddApi<CalculatorApi>();
If you now start the application, the Swagger UI will still display an empty list of operations:

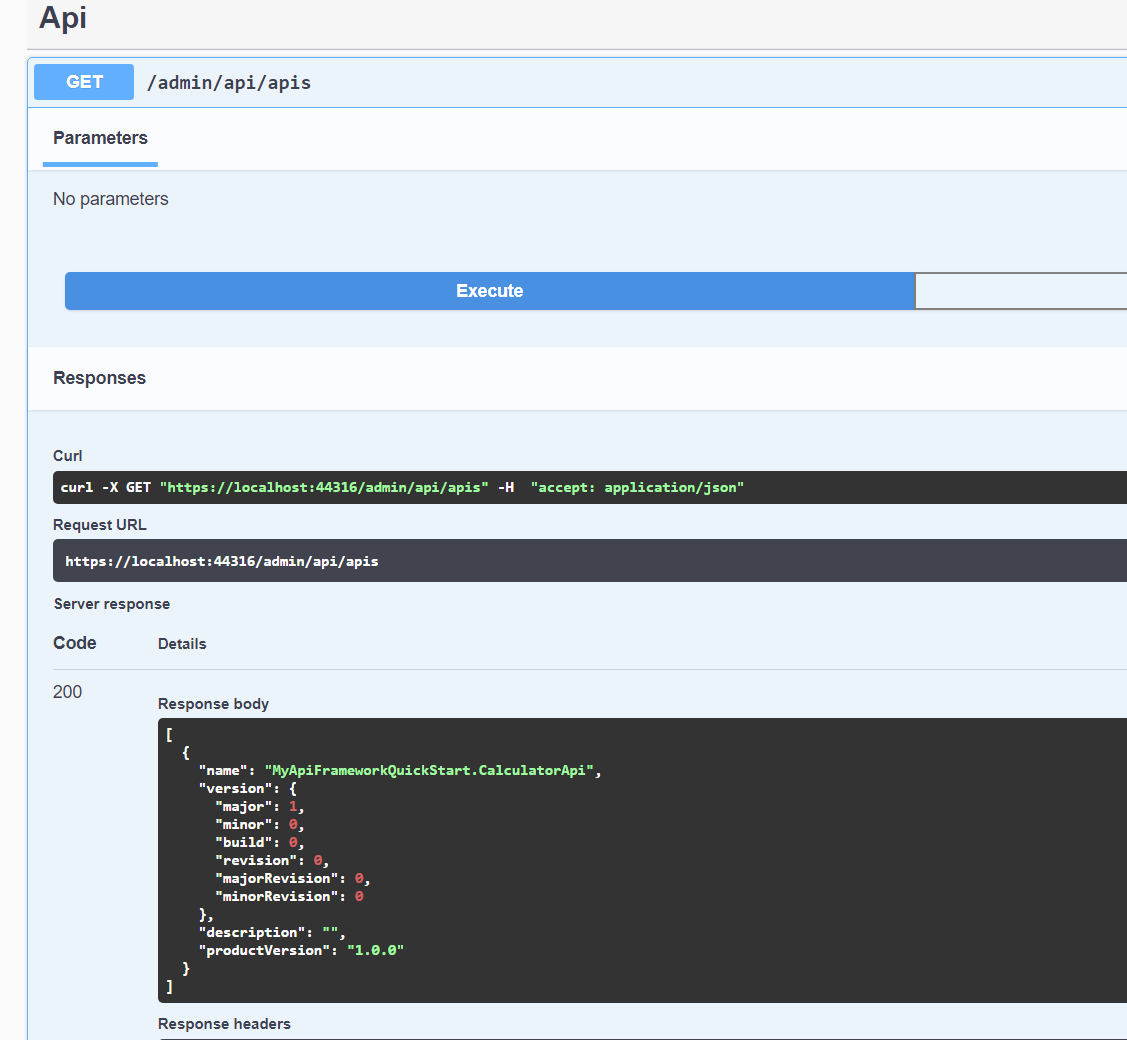
But if you check the Admin-document and get all the APIs, you should see the newly registered API:
Now its time to add the first Endpoint. This can be done runtime or through the code. We will use code.
The key properties when defining an endpoint are:
- The route
- The api
- The configuration (if needed)
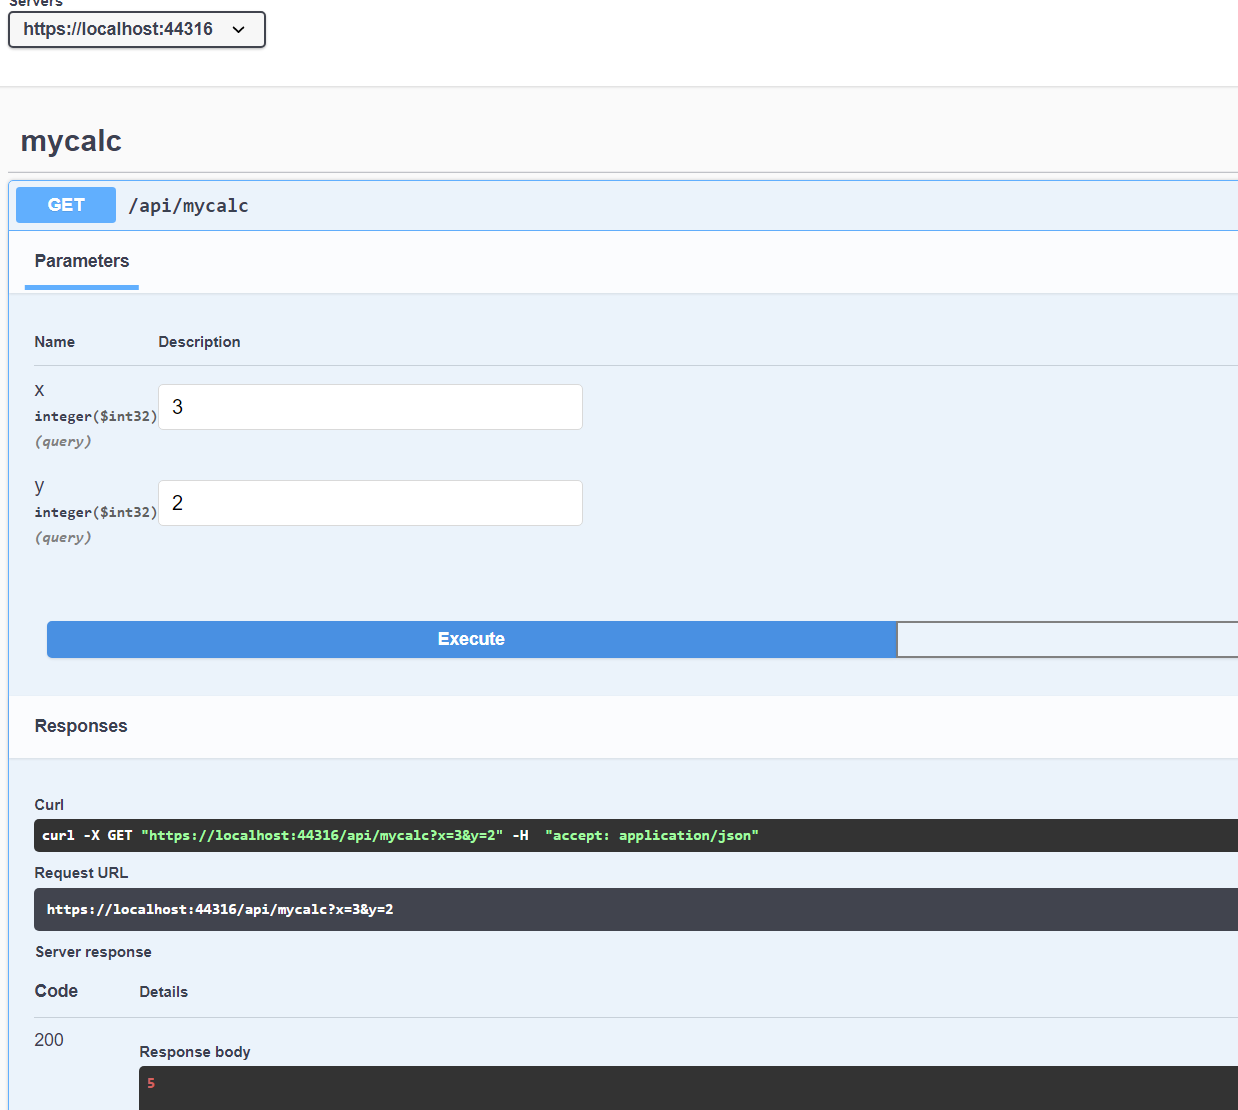
Our API doesn't require a configuration, so we only need to define the route and the used API. This is done in the ConfigureServices and the AddApi method can be used as shortcut for defining the endpoint:
services.AddApiFrameworkStarterKit()
    .AddApi<CalculatorApi>("/mycalc");
Now when the app is run, you should see the mycalc-endpoint and its operation.
Note: The APIs and Endpoints are initialized asynchronously, after the system has started. If you quickly view the Swagger UI after starting the app, the operation list may be empty as the initialization of API Framework happens on the background.
Note: By default, API Framework uses /api as the the base path for all the endpoints.
We have our first API and Endpoint running! The next step is to create an another API using a delegate.
Creating an API using Delegate
API Framework is powered by Plugin Framework. Thanks to Plugin Framework, we can create APIs using tools like delegates, Roslyn and Nuget. In this chapter we create an API using a Delegate.
The second API is almost as simple as the first one: Hello world, but with a small twist: It demonstrates how the ASP.NET Core's DI-system is operating even when APIs are created using delegates. Here's the new API:
Func<ILogger<Startup>, string, string> helloApi = (logger, name) =>
{
   logger.LogInformation("Running the API using parameter {Name}", name);
   return $"Hello {name}!";
};
API can be added using the same AddApi-method as the first API.
public void ConfigureServices(IServiceCollection services)
{
    services.AddControllers();

    Func<ILogger<Startup>, string, string> helloApi = (logger, name) =>
    {
       logger.LogInformation("Running the API using parameter {Name}", name);
       return $"Hello {name}!";
    };

    services.AddApiFrameworkStarterKit()
        .AddApi<CalculatorApi>("/mycalc")
        .AddApi(helloApi, "/myHello");
}
Now when run, we see that the application contains two endpoints:

We can also see through the Visual Studio that the dependency injection works as expected

Now it is time to turn things up a notch and add configuration support for the APIs.
Adding Configuration & Multiple Endpoints
As previously mentioned, each endpoint is specified by three things:
- The API
- The route
- The configuration
The configuration is optional. Not all the APIs need one. But in the context of reusability, APIs often need configuration. Configuration is a .NET object (or JSON config if defined though appsettings.json).
It's important to notice that configurations are endpoint specific. This allows one to create multiple different endpoints using the same API, with all of them having a separate configuration. Our current APIs don't support configuration but adding a one is straightforward: We add a property with name Configuration.
Let's add a class which represents the configuration for our Calculator API:
public class CalculatorConf
{
    public int TheZFactory { get; set; } = 0;
}
The configuration can be injected into the API using property injection. Here's the modified Calculator API:
public class CalculatorApi
{
    public CalculatorConf Configuration { get; set; }

    public int Sum(int x, int y)
    {
        return x + y + Configuration.TheZFactory;
    }
}
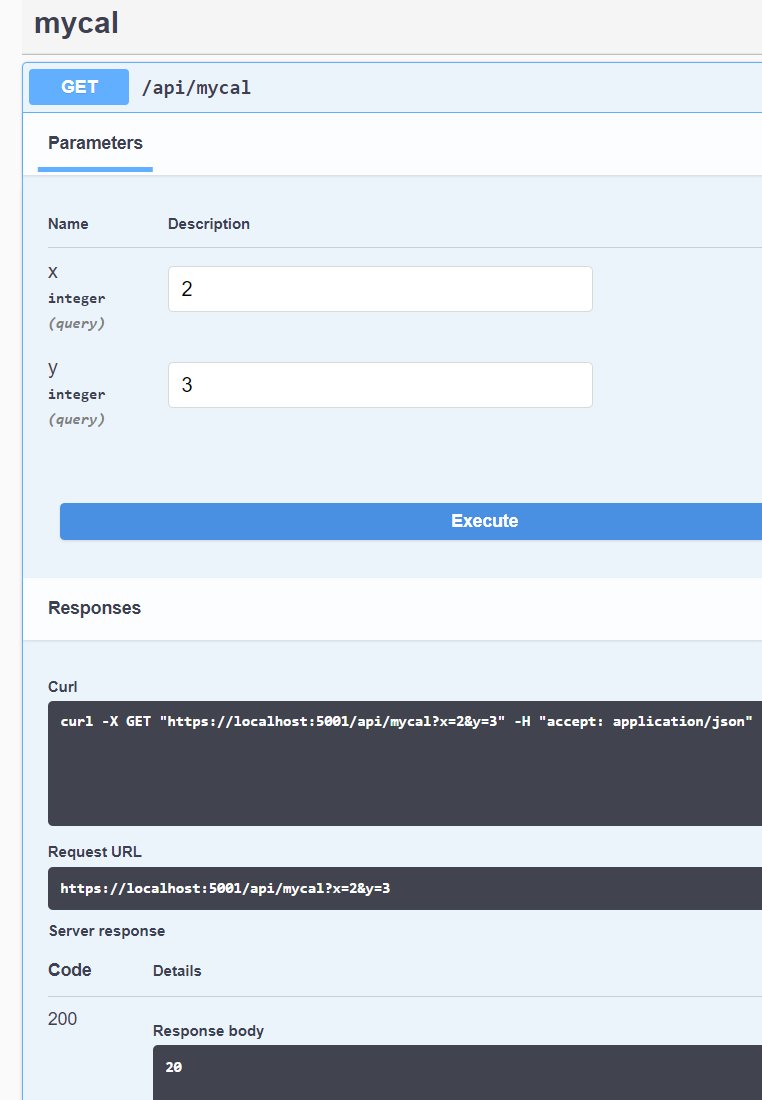
The configuration is endpoint specific so we add the configuration when defining the endpoint. Currently we are using AddApi to both register the API and to create the endpoint. Let's separate these so that the API is registered and the endpoint is created separately, in ConfigureServices. This allows us to provide the configuration for the endpoint:
services.AddApiFrameworkStarterKit()
    .AddApi<CalculatorApi>()
    .AddEndpoint<CalculatorApi>("/mycal", new CalculatorConf() { TheZFactory = 15 })
    .AddApi(helloApi, "/myHello");
Instead of defining the separate CalculatorConf type, we could use integer directly as the configuration:
public class CalculatorApi
{
    public int Configuration { get; set; }
    public int Sum(int x, int y)
    {
        return x + y + Configuration;
    }
}
And:
services.AddApiFrameworkStarterKit()
    .AddApi<CalculatorApi>()
    .AddEndpoint<CalculatorApi>("/mycal", 15)
    .AddApi(helloApi, "/myHello");
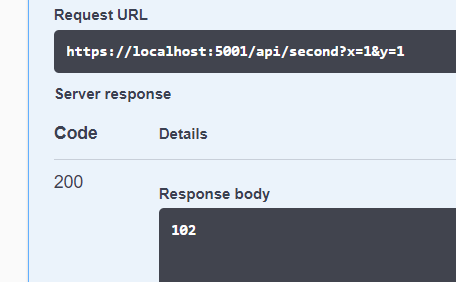
As the conclusion of this how-to guide guide, we will add multiple endpoints for the same API, each with different configuration:
services.AddApiFrameworkStarterKit()
.AddApi<CalculatorApi>()
.AddEndpoint<CalculatorApi>("/mycal", 15)
.AddEndpoint<CalculatorApi>("/second", 100)
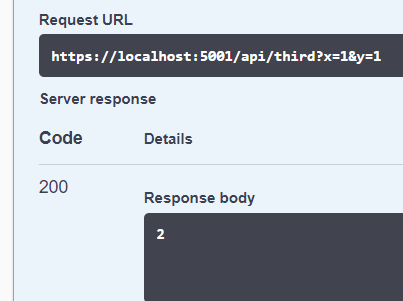
.AddEndpoint<CalculatorApi>("/third", 0)
.AddApi(helloApi, "/myHello");
Now when run, we can see that we have the three endpoints, /mycal & /second & /third, and each one of them answers to our request with a different response, based on their configuration.
And for comparison:
Source Code
Source code for this sample is available from GitHub: https://github.com/weikio/ApiFramework.Samples/tree/main/howtos/1_ApisAndEndpoints
Next Steps
This guide introduced the following concepts:
- How to create APIs using POCOs and delegates
- How to define Endpoints
- How to define the configuration for an Endpoint
The next how-to guide will introduce the API Framework's plugin system. Reusability is one of the core values which API Framework brings to the table and reusability is in many cases provided by plugins.